Try to figure out why you can access the external drive on your macOS? If you are finding it hard to do, that means the external hard drive may be an NTFS formatted drive. Read on to know how you can read and write NTFS drives on Mac.
MacBooks and Windows computers have their proprietary file systems just like the APFS file system for Mac and the NTFS file system for Windows. Hence, Mac machines have restrictions on the use of the NTFS file system, and NTFS files will be presented as read-only on macOS.
Is there any way to enable the write function of the NTFS drive or fix the NTFS read-only issue on Mac? Just read on to know how you can take some effective measures to read and write NTFS drives on Mac.
How to Read and Write NTFS Drives on Mac?
While doing our research for a probable solution to help you write NTFS drives on Mac, we came across several solutions; some were more potent and effective than others. There were even rumors that with the launch of the new M1 chip, the whole NTFS read and write problem will be solved, but those rumors were proven false.
Therefore, we were back to square one. This time we started looking for some practical solutions that can help you with any version of macOS. This is what we found.
1. Change the Settings in Terminal
As we know that macOS does not have any obvious feature to support writing NTFS drives; however, only a few Mac users know about this experimental feature where with a little bit of coding knowledge, you can easily use the read-write function on NTFS drives.
This method uses Terminal to enable the NTFS drive write support on Mac. To open the Mac Terminal program, go to Launchpad > Other, and then click Terminal to launch it. Now type sudo nano /etc/fstab so as to proceed with the fstab file editing, and press enter.

Here, you will be needed to give the password. Once the password is accepted, type LABEL=DISKNAME none ntfs rw,auto,nobrowse.Make sure that DISKNAME in the command has been replaced with the true name of your drive.By now, you have given all the necessary commands to allow yourself to write the NTFS drive on Mac. Now save the settings and exit the Terminal page.

After exiting the Terminal window, let your NTFS drive connect with your Mac machine again. Then, you need to navigate to Go > Go to Folder from the top menu bar. Next, input /Volumes and click the Go option. Finally, you should check if this method succeeds in enabling the NTFS write function.

2. Use a Different Format for the NTFS Drive
If you are not confident in your coding skills or think the first method might be just too complicated for you to execute, then reformatting the drive might be the best solution. Now that the NTFS drive is not being supported on the Mac, changing the drive format to the format your system supports gets the job done.
Before you can get started with this method, you are advised to back up all your data to avoid any data loss. Backing up the data ensures that the stored data will be secure even if anything bad happens.
- Insert the NTFS drive into your Mac and go to Disk Utility by clicking Launchpad > Other from the Mac dock.
- Find and select the NTFS drive you desire to format from the sidebar on the Disk Utility interface.
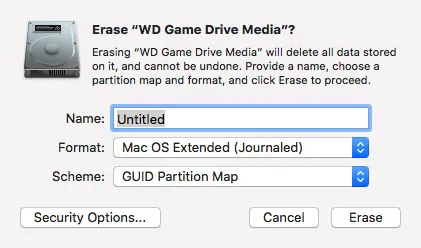
- Click the Erase button from the toolbar on the top. Then, the Erase window will pop up and a list of settings related to the NTFS drive will appear. Here, you need to edit a new disk name and select exFAT or FAT32 as the format. If necessary, you can also select a scheme.

- Erase the current format by clicking the Erase button.
- Click Done when the formatting process is over.
3. Take Help from NTFS for Mac Software
Although the above two methods are effective, most people always go for the third method in the list, namely, using an NTFS for Mac tool to read and write NTFS drives on Mac. Why do users do this? The probable reason is that they may have difficulty using Terminal or they are afraid that disk erasure will cause further data loss. Thus, taking help from an NTFS for Mac application is the optimal choice.
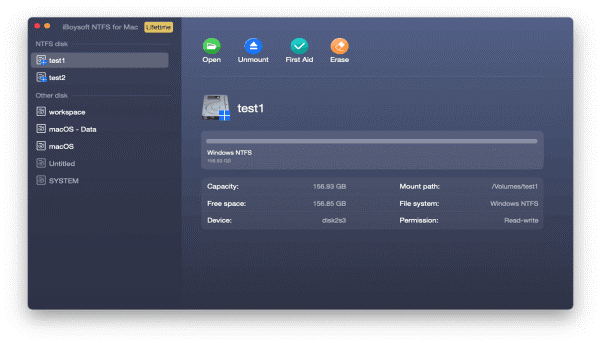
Despite there being so many tools in the market, we prefer iBoysoft NTFS for Mac software. It is one of the most feature-rich NTFS for Mac programs with all the needed features to access the NTFS drives including reading and writing to NTFS drives on Mac, checking and repairing disk errors found in an NTFS drive, formatting the NTFS drive, erasing non-NTFS disks to NTFS, and so forth. To enjoy the convenience the iBoysoft NTFS for Mac tool brings, just do as follows:
- Find iBoysoft NTFS for Mac from its official website and click the download button to get it downloaded.

- Connect the NTFS drive with your Mac device.
- Launch iBoysoft NTFS for Mac to use the read and write function of the NTFS drive easily.

To Sum It Up
If you use multiple NTFS drives for your work, it is time-consuming to back up all your data before formatting it to a supported file system. And if you avail of services from a paid subscription backup, it might sometimes become impossible to manage it financially.
Therefore, enabling the NTFS write support on your Mac is the best way to attain a long-term solution. This article has discussed the different methods you can use to enable the NTFS write function on Mac, but compared with two other methods, using iBoysoft NTFS for Mac is the most convenient.


Leave a Reply